Understanding Aspect Ratios in Photo PrintingUpdated 2 months ago
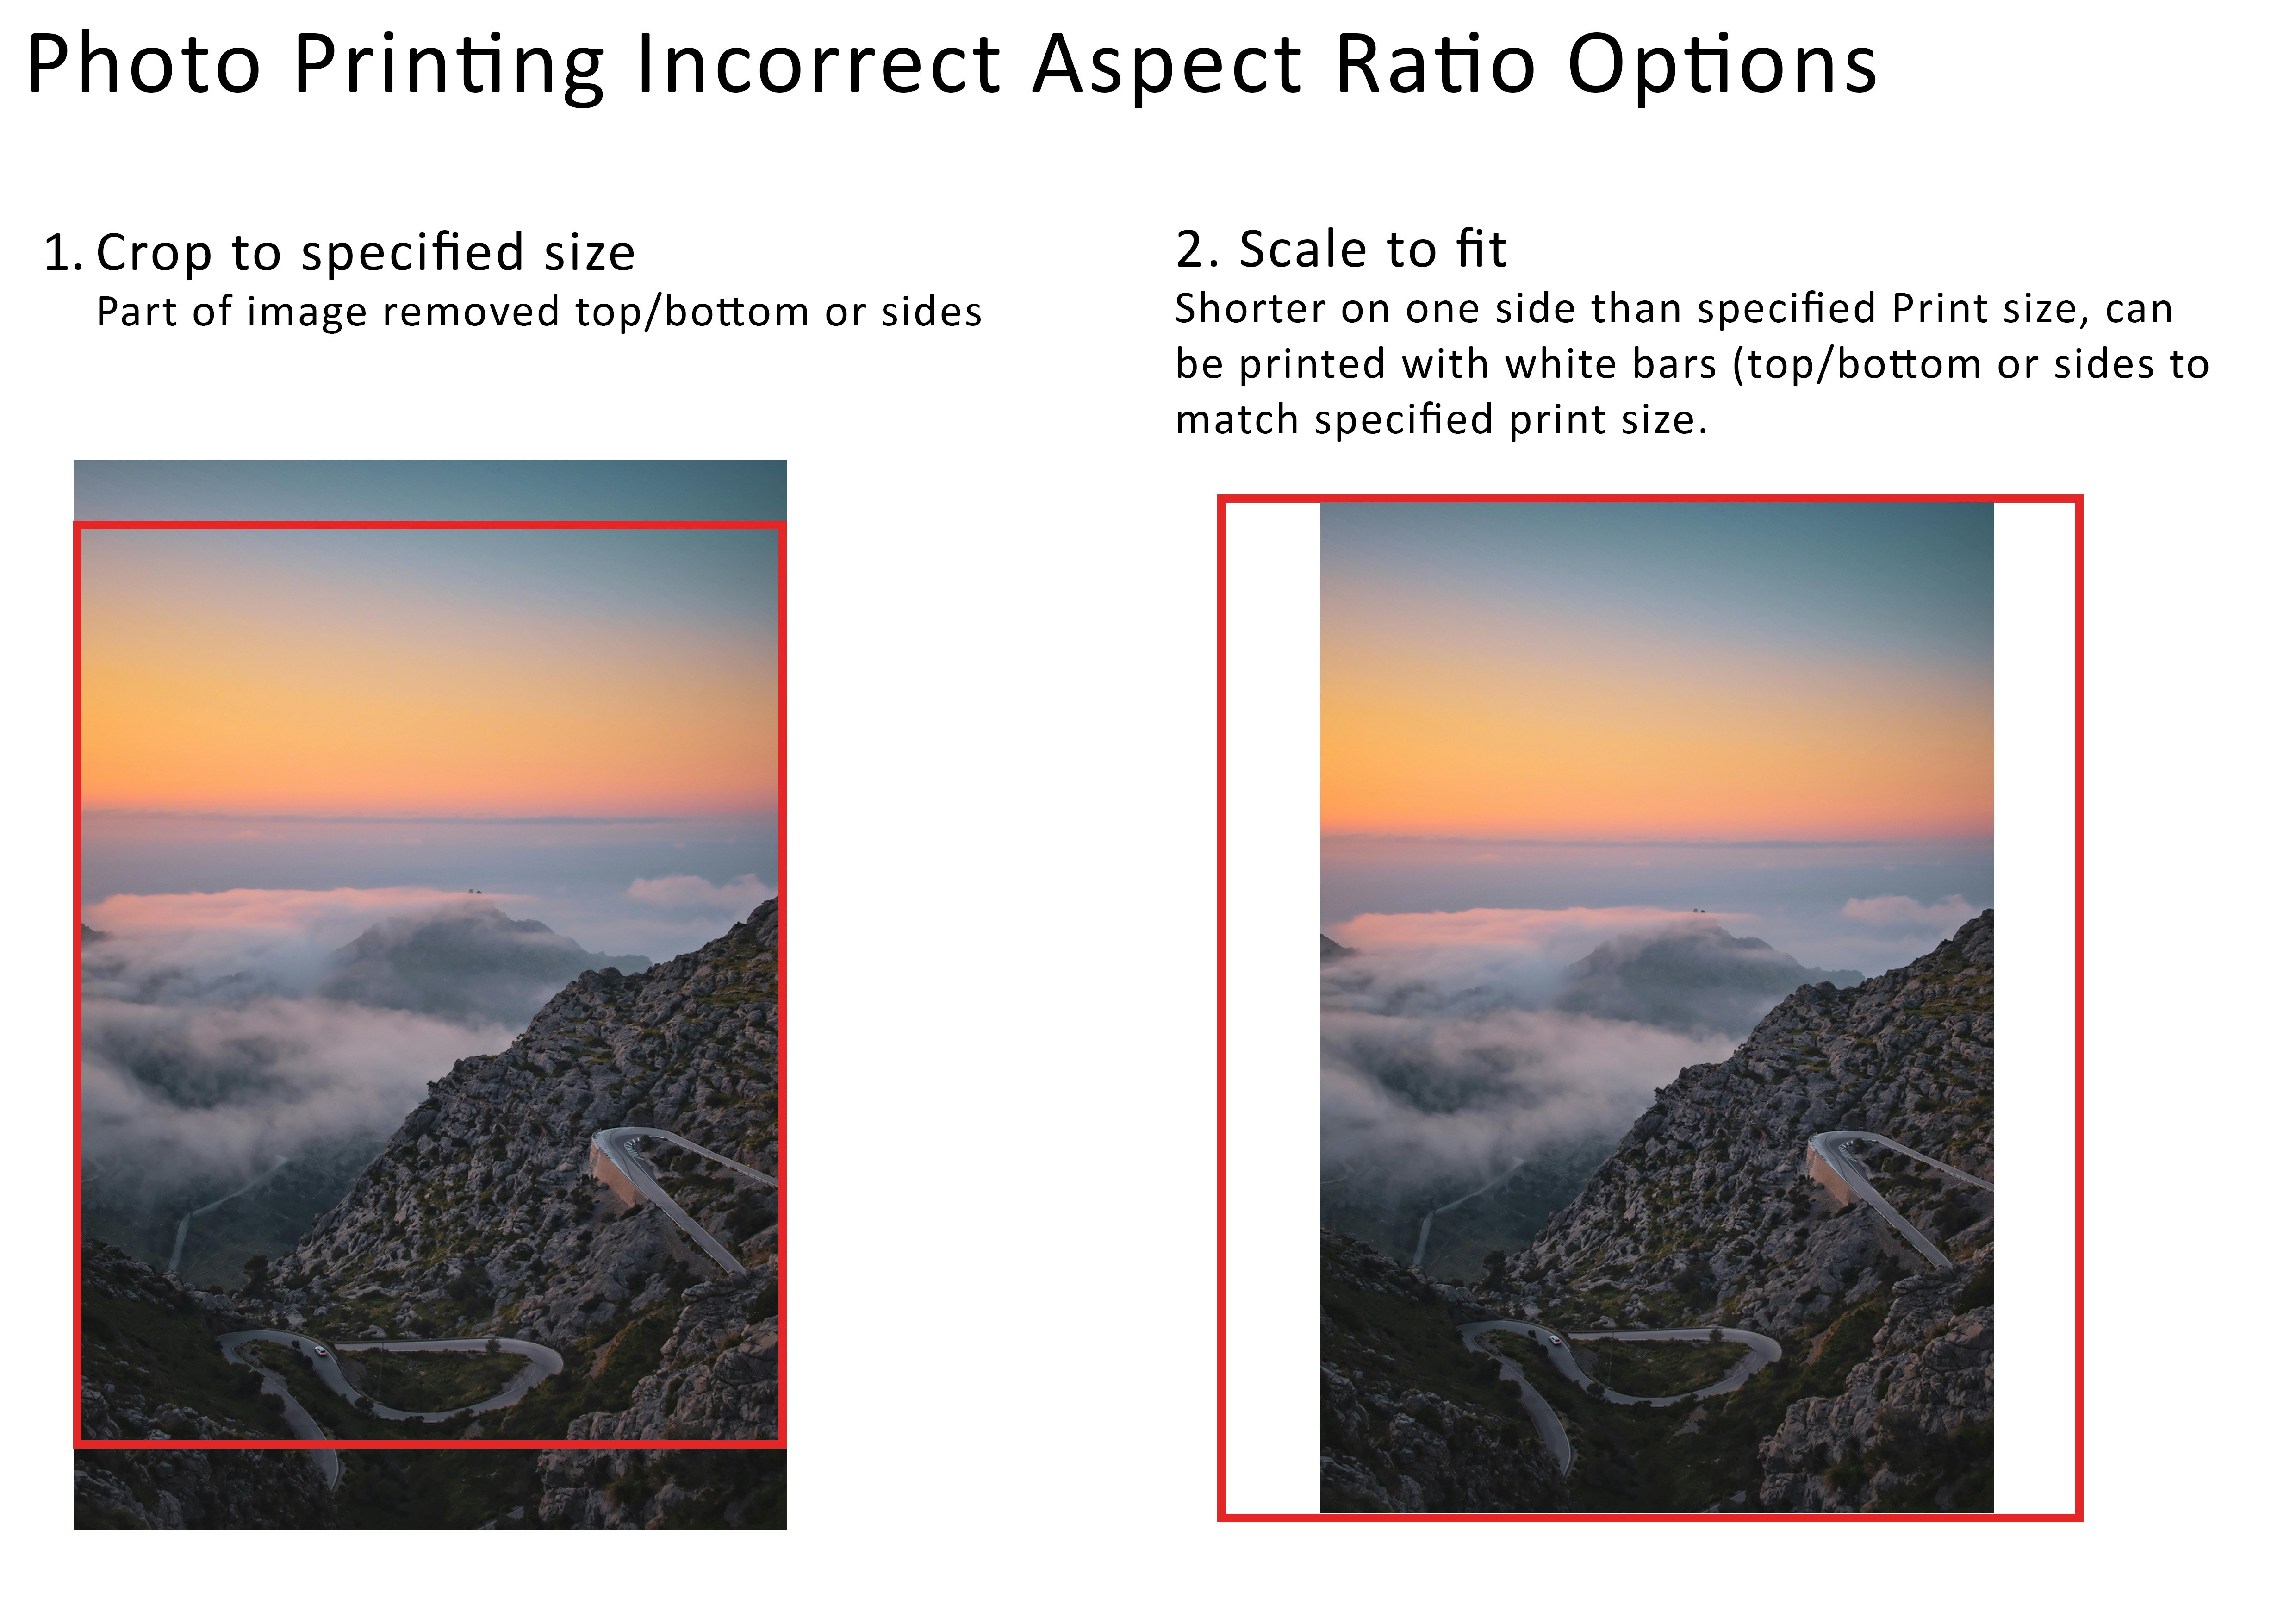
Photos and paper are rarely the same shape. A standard camera photo is 3:2, but an 8x10" print is 5:4, so something has to give: either part of the image is trimmed off, or white bars appear at the edges.
The good news is that you no longer have to predict any of this. Our print portal shows you exactly what will be cropped, lets you drag the crop where you want it, and warns you if the shapes do not match. This guide explains what is happening and how to get the result you want.
What is an Aspect Ratio?
An aspect ratio is the proportional relationship between the width and height of an image, written as two numbers such as 3:2 or 4:3. It describes shape, not size. A 4x6" and a 20x30" print are wildly different sizes but exactly the same shape, which is why one photo fits both perfectly.
When the shape of your photo does not match the shape of your paper, something has to be adjusted.
Common Camera Aspect Ratios
| Camera/Device Type | Aspect Ratio |
|---|---|
| 35mm Film Cameras | 3:2 |
| Most DSLR & Mirrorless Cameras | 3:2 |
| Micro Four Thirds Cameras | 4:3 |
| Most Smartphones (photo mode) | 4:3 |
| Smartphones (wide or video mode) | 16:9 |
| Medium Format (6x4.5) | 4:3 |
| Medium Format (6x6) | 1:1 (Square) |
| Medium Format (6x7) | 7:6 |
| Large Format (4x5) | 5:4 |
How Much Gets Trimmed?
Here is the same 3:2 photo filling five different papers. The striped areas are what gets trimmed away:
The same 3:2 photo, filling five different papers.
8x10" is the one that catches people out. It looks like a modest step up from 8x12", but it trims roughly a sixth off your composition.
Your Two Options
The Portal Shows You Before You Order
You do not need to work any of this out in advance:
- The preview shows the actual crop, so you can see what will be lost
- If the shapes do not match, a note appears saying the image does not fit the print, with a Fix button
- Open Adjustments on any photo to drag the image around and place the crop exactly where you want it
- Prefer no cropping at all? Switch that photo to fit and keep the whole frame with white borders
This is the part that changed. It used to be worth cropping everything in Lightroom first. Now you can do it while you order, looking at the actual print shape.
Or Skip the Problem: Choose a Custom Size
You are not limited to standard sizes. In the portal you can enter any custom size from 4" on the short edge up to 40 x 60", and the price updates as you type.
This is the cleanest answer to an awkward ratio. Shooting 6x7 medium format, or a 16:9 panorama, or an unusual crop of your own? Enter the exact dimensions you want and nothing gets trimmed at all.
Quick Reference: Sizes That Match Your Camera Exactly
3:2 (35mm film, DSLR, mirrorless)
Perfect match: 4x6", 5x7.5", 6x9", 8x12", 12x18", 16x24", 20x30", 24x36", 40x60"
Minor crop: 5x7" (7%), A3, A2, A1, A0 (about 6%)
Significant crop: 8x10" (17%), 11x14" (15%), 16x20" (17%)
4:3 (smartphones, Micro Four Thirds, 6x4.5)
Perfect match: 6x8", 12x16", 30x40", 36x48"
Minor crop: 5x7" (5%), 8x10" (6%), 11x14" (5%), 16x20" (6%)
1:1 (square, 6x6 medium format)
Perfect match: 5x5", 6x6", 8x8", 16x16", 20x20", 24x24", 40x40"
5:4 (4x5 large format)
Perfect match: 8x10", 11x14", 16x20"
16:9 (phone wide and video mode)
No standard size matches this shape. Either crop to 3:2 while you order, or enter a custom size and lose nothing.
7:6 (6x7 medium format)
Nothing matches exactly. 20x24" is closest at about 3%. A custom size is the better answer.
Panoramas
For genuinely wide images we stock two panoramic C-Type sizes: 6x24" (1:4) and 8x24" (1:3). Anything else wide is a good candidate for a custom size.
Cropping Before You Upload
This is now optional, but some people prefer to make crop decisions in their own software with their own tools. If that is you:
In Adobe Lightroom:
- Select the Crop tool
- Click the aspect ratio dropdown
- Enter your print dimensions (e.g. 8x10)
- Adjust the crop to your liking
- Export
In Adobe Photoshop:
- Select the Crop tool
- Enter your dimensions in the options bar (e.g. 8 in x 10 in)
- Adjust the crop area
- Press Enter to apply, then save
Upload the cropped file and the portal will see it as an exact match, with no warning and no further cropping.
Adding Your Own Borders
If you like the "fit" look but want a coloured border rather than white, create a canvas at your print dimensions in your editing software, centre your image on it, and fill the background with the colour you want. Upload that and it prints edge to edge exactly as you built it.
If you want a white mount around a framed print, you do not need to do this yourself. Choose the double matt border option when you add a frame and we mount it properly behind archival board.
Still Have Questions?
If you are unsure how your image will print, or which size suits your photos best, please get in touch. We are happy to help you get the best result.
Email: [email protected]
Phone: 02 8041 7049